Editor’s note: This piece is the second of two parts. Part one, which explains data tolerances and discusses the communication issues that make registration difficult, can be found here.
There are a few techniques that I’ve found help a quite a bit with registration.
1 – First Things First
It’s never a bad idea–especially for a new scanning firm–to survey in the targets on the first few projects to verify your registration workflow. However, over time and with some established quality control processes in place, you can start trusting registration software more and more. You just get to help those clever algorithms figure things out a little bit. (It should be noted that for large scan projects, using survey control is always a good practice. Although, depending on the coordinate system, some 3D laser scanning registration packages may not round large numbers well and therefore produce mixed results or even partially corrupted data. More on that in later blogs.)
In order to register scans together, the algorithms must first have at least three reference points that correlate between scans. Some call this a “constellation” of reference markers. That means, if we have two scans that we are going to register together, the first scan must include three geometric references (which could be a sphere or checkerboard target, a spot on a wall, a cylindrical object, a plane on a floor, etc) that the second scan can also see – even if they are from different vantage points. The software then calculates the geometric arrangement of these references and attempts to match a similar arrangement in other scans.
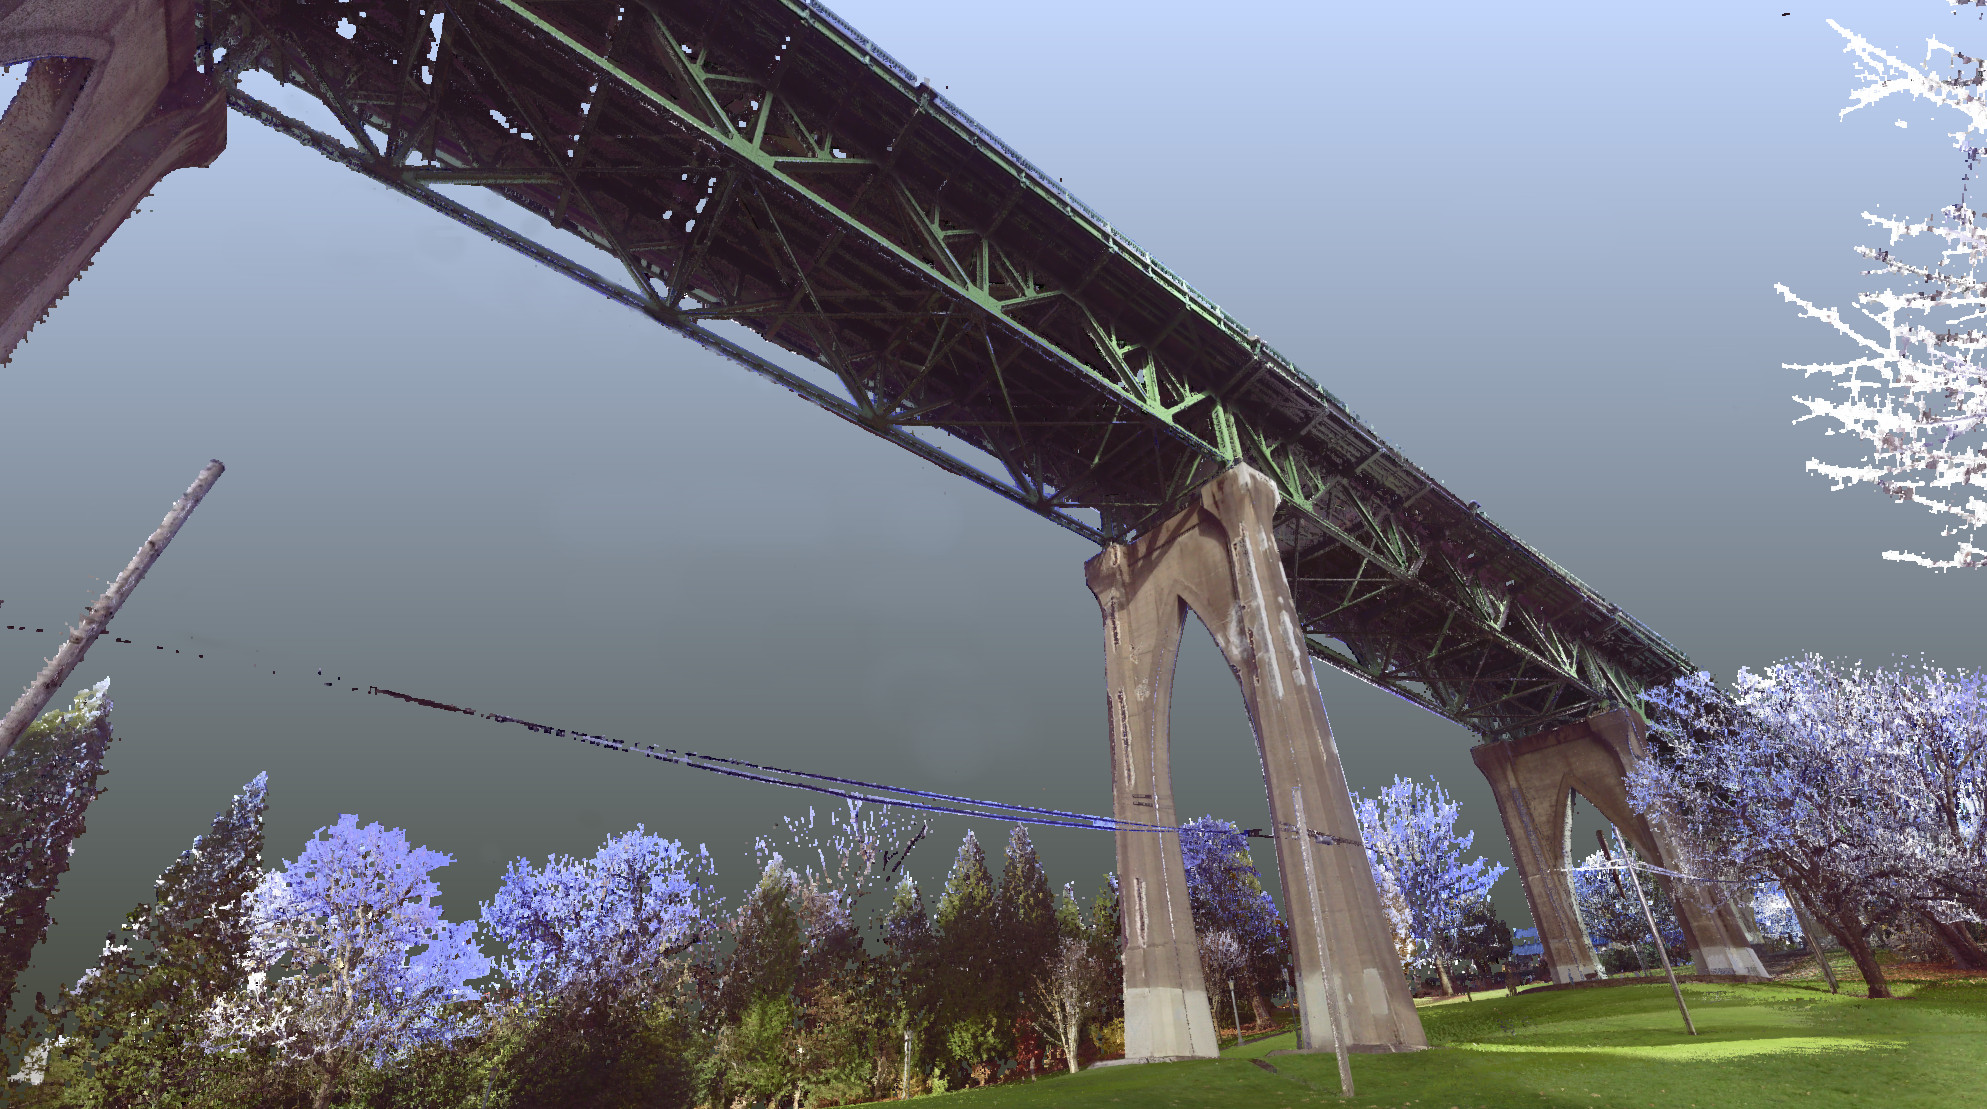
Registering and assembling a point cloud.
2 – Targeting for Registration: Downright Mean, with Tension
There are a number of terms used in registration report to indicate what the algorithms are trying to do and how they calculate point cloud matches. Finding a way to understanding them can go a long way toward successful target placement, field operations, and post-processing quality control.
Weighted Statistics: I like to think of weighted means, minimums, maximums and deviations as the software’s way of telling you that sometimes the targets are pulling the “strings” too tight or leaving the strings too loose. When the algorithms are considering scan registration solutions, they perform averaging in an attempt to evenly distribute the error – sometimes known as “global softening.” The stitch is made, then the software tries to ‘soften’ the stitch to averaged the error across the entirety of the registered scans.
“Balancing the Ball” – Using a bit of imagination, consider a red rubber ball which represents a single scan. Now imagine that three strings are attached to that rubber ball–suspending it above the ground–with each string thumb-tacked evenly to walls in a room. The ball is in perfect triangular balance.
In the diagram below, the thumb-tacks (green diamond shapes) represent targets and the string carries the tension between the target (tack) and the scan (ball).

Fig.1) Balanced Tension
If we take the tacks and string and move them to anywhere else in this room, some strings will become more tense and others will become more slack:

Fig.2) Imbalanced Tension.
Notice how moving the strings and tacks around changes tension on the strings. A very simple example but perhaps instructive toward what role the term “tension” has in the software. This concept can support our overall goal of targeting in the field to assist the software to create an accurate registration.
3 – How to Place Targets in the Field
When placing physical targets in the field, it’s important to keep this illustration in mind because an even and wide distribution of targets creates a more probable, balanced tension than targets that are close together.
Having targets in a straight line from the vantage point of a scanner is one of the worst scenarios for registration, because the algorithms cannot easily determine the spatial relationship of the scans to one another. Distributing targets widely and at varying elevations is a good practice. That goes for spheres and checkerboards or other physical targets. Also, while it may seem tidy to distribute targets at an even elevation along the walls at an equal distance, nothing can confuse registration algorithms more than this repeating pattern (constellation) of targets. Variety is your friend when placing targets – not too close to one another, and varying distances from one another will save you a lot of headache in post-processing.

4 – How to QA/QC
If you are using physical targets in the field and generating larger data-sets, it is inevitable that scans will not come together perfectly, and the overall statistics will indicate your ‘weighted mean’ is beyond the 4-6mm tolerance that you were hoping for with automatic registration. Looking to your registration report can provide clues on how to correct this and tighten your registration tolerance. I think of it as ‘pruning’ or ‘snipping’ the strings that have too much tension to balance out the rubber ball.
You may see, when looking over the Target Tensions tables, that some targets have tension values that are quite high and others have values that are low. At first glance, and with some visual QC, it can be clear that a few scans are having trouble coming together, which in turn is throwing everything else off. I suggest deleting targets with the highest tensions, one at a time, re-running your registration tool (aka “Place Scans” in FARO Scene), and seeing what happens. If needed, you can always select those targets again in the planar view, adding them back into the equation. It’s a bit of trial and error, but a good place to start.
Note that if you are using top-down or cloud-to-cloud registration for any reason, the target tensions may increase quite a lot since the software is now ignoring physical targets and trying to make the best matches using the point cloud’s geometry only. My workflow for registration (in a broad sense) is to use targets first, prune, get it as tight as possible, then run cloud-to-cloud on what remains. This produces good results in almost every scenario.
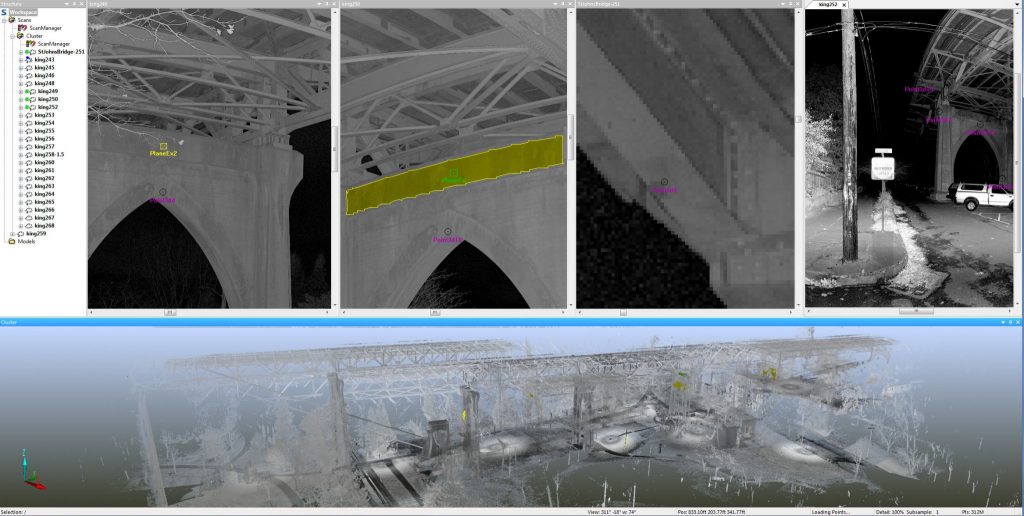
5 – Validate
As a parting thought, even if the targets are placed well in the field, there are several optic anomalies that can occur in the automated target identification and registration process. When I teach workshops on registration to newcomers, and after the initial pre-processing of the scans (before “Placing Scans”), I walk technicians through a “target validation” process. Target validation includes opening each and every scan in planar view to ensure the software has identified all the physical targets placed in the field, and deleting mis-identified targets such as those cast in reflections, water, or other objects (like my round head).